The 90s were a vibrant time for fashion and beauty, and the makeup trends from that decade are making a comeback. Think bold colors, matte finishes, and iconic styles that defined an era. Whether you want to channel your inner grunge queen or rock a pop star look, this guide will help you achieve the perfect 90’s makeup look. Get ready to step back in time and embrace those unforgettable beauty trends!

Defining 90’s Makeup: What Made It Iconic?
The 90s makeup aesthetic was a bold, eclectic mix of minimalism and rebellion that defined an era of cultural shifts and iconic beauty trends. It was characterized by a duality of looks: the fresh-faced, “no-makeup” makeup of supermodels like Kate Moss, with dewy skin, nude lips, and subtle brown eyeshadow, contrasted by the grunge-inspired edge of smudged eyeliner, dark berry lipsticks, and matte complexions popularized by stars like Courtney Love.
The decade embraced experimentation, from frosted eyeshadows and thin, over-plucked brows to glittery lip gloss and blue eyeshadow moments inspired by pop icons like Britney Spears. This versatility, paired with a focus on individuality, made 90s makeup iconic, as it mirrored the era’s blend of raw authenticity and glamorous excess, leaving a lasting influence on modern beauty trends.
Key Takeaways
- A matte base is essential for achieving that flawless 90’s look.
- Bold eye makeup, especially smokey eyes, is a must-have for authenticity.
- Brown lip liner paired with dark lipstick is a signature of 90’s makeup.
- Blush should be applied lightly to add a natural flush without overpowering the look.
- Accessorizing is key—choose the right jewelry and hair accessories to complete your 90’s vibe.
Achieving The Perfect Matte Base

The 90s were all about that airbrushed, flawless look, and it starts with the base. Forget the dewy, glowy skin of today; we’re going for matte! It might seem intimidating, but trust me, it’s totally achievable with the right steps.
Choosing The Right Foundation
Finding the right foundation is key. You want something that matches your skin tone perfectly and provides good coverage. Opt for a matte foundation; formulas designed for oily or combination skin often work best. If you’re unsure about your shade, test a few different ones in natural light. Don’t be afraid to ask for help at the makeup counter – that’s what they’re there for!
Applying Foundation Evenly
Application is just as important as the foundation itself. Here’s what I do:
- Start with a clean, moisturized face. This helps the foundation go on smoothly.
- Use a primer! A good face primer will create a smooth canvas and help your makeup last longer.
- Apply the foundation with a damp makeup sponge or a foundation brush. Blend, blend, blend! Pay extra attention to your hairline and jawline to avoid harsh lines.
Remember, less is more. You can always build up the coverage where you need it, but it’s harder to take away excess product.
Setting With Translucent Powder
To really lock in that matte finish, translucent powder is your best friend. It absorbs excess oil and prevents your foundation from creasing. Here’s how to use it:
- Use a large, fluffy brush to apply the powder all over your face.
- Focus on areas that tend to get oily, like your forehead, nose, and chin.
- Dust off any excess powder with a clean brush. You don’t want to look cakey!
And that’s it! With these steps, you’ll have a perfect matte base that’s ready for the rest of your 90s makeup look.

Creating Iconic 90’s Eye Makeup
The eyes were a major focus in the 90s, and there are several ways to achieve that authentic 90’s makeup style. From grunge-inspired smudges to more polished looks, the options are plentiful. Let’s explore how to nail those iconic eye looks.
Choosing The Right Eyeshadow Colors
In the 90s, eyeshadow was all about making a statement. Think matte browns, grays, and even mauves for a more understated look. But don’t be afraid to experiment with bolder colors like blues and greens, especially frosted shades. Pastel shimmer shades were also super popular.
Mastering The Smokey Eye
The smokey eye wasn’t just a trend; it was a 90s staple. To achieve this look:
- Start with an eyeshadow primer to ensure longevity.
- Apply a dark eyeshadow (brown, gray, or black) to your lid.
- Blend, blend, blend! Use a fluffy brush to soften any harsh lines.
For a grunge twist, smudge the eyeshadow along the lower lash line. This gives a more lived-in, effortless vibe.
Applying Eyeliner Like A Pro
Eyeliner was definitely a key player in the 90’s supermodel makeup guide. Whether you prefer a thin line or a bolder wing, eyeliner can define your eyes and add a touch of drama. Smudged eyeliner was also a popular choice for a grunge-inspired look. Experiment with different textures, from pencils to gels, to find what works best for you.
Here’s a quick guide to different eyeliner styles:
| Style | Description |
|---|---|
| Thin Line | Subtle definition along the lash line |
| Winged Liner | A classic, slightly more dramatic look |
| Smudged | Effortless, grunge-inspired |
| Kohl | Intense, smoky effect, great for the waterline |
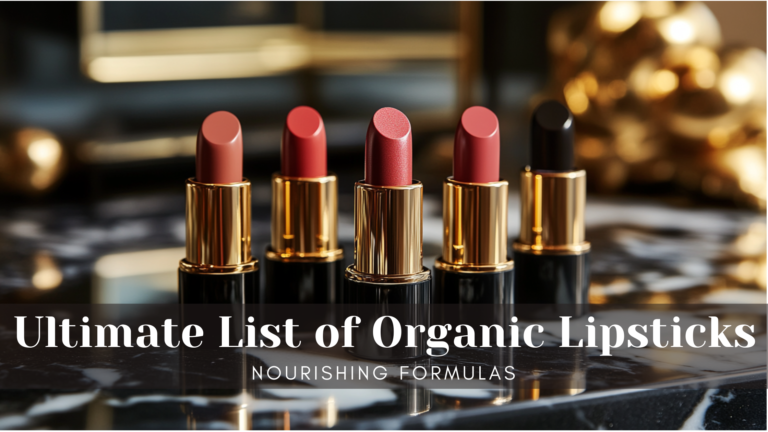
Defining Your Lips With Bold Colors

The 90s were all about making a statement, and nothing says “statement” quite like a bold lip. Think rich browns, deep reds, and even a touch of frost. It’s time to channel your inner supermodel and rock those iconic lip looks.
Using Brown Lip Liner
Brown lip liner is your best friend for achieving that classic 90s lip. The key is to choose a shade that’s a bit darker than your natural lip color. This creates definition and adds a touch of drama. Carefully outline your lips, paying attention to your Cupid’s bow. You can either fill in your lips completely with the liner for a matte look or blend it slightly towards the center.
Selecting The Perfect Matte Lipstick
Matte lipstick was HUGE in the 90s. Think nudes, browns, and deep reds. When choosing your shade, consider your skin tone.
- Fair skin: Opt for lighter browns or rosy nudes.
- Medium skin: Try caramel or toffee shades.
- Dark skin: Go for deep chocolate or berry tones.
Apply your lipstick carefully, making sure to stay within the lines of your lip liner. For a more modern twist, you can also try a matte liquid lipstick.
Blotting For Long-Lasting Wear
Want your bold lip to last all day (or night)? Blotting is the secret! After applying your lipstick, gently press a tissue against your lips to remove excess product. Then, apply another thin layer of lipstick. This helps to set the color and prevent it from smudging or fading. You can even dust a tiny bit of translucent powder over the tissue for extra staying power.
I remember trying to get the perfect brown lipstick in the 90s. It was a struggle! The drugstores didn’t have the best selection, and everything was either too orange or too muddy. Now, there are so many amazing options available, it’s easy to find the perfect shade for any skin tone.

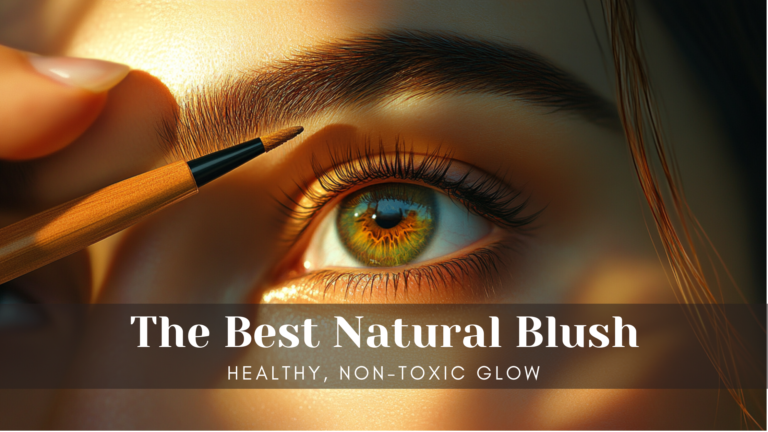
Adding Color With Blush
Choosing The Right Blush Shade
Okay, so blush in the 90s wasn’t about that super rosy, ‘I just ran a marathon’ look. It was more subtle, a hint of color to add dimension. Think less ‘flushed cheeks’ and more ‘naturally sculpted’. For fair skin, a light peach or a soft pink works wonders. Medium skin tones can rock a berry shade, and deeper skin tones look amazing with a brick red or a vibrant plum. The goal is to find something that complements your skin without overpowering it. I usually test a bit on my wrist to see how it looks in natural light. Don’t be afraid to experiment! You can also use cream blush for a more natural look.
Application Techniques For A Natural Look
Application is key! You don’t want to end up looking like a clown. Start by smiling – this helps you find the apples of your cheeks. Apply the blush there, and then blend upwards towards your temples. Use a fluffy brush for a soft, diffused look. If you accidentally apply too much, don’t panic! Just grab a clean brush and blend, blend, blend until it’s softened. Remember, less is more. You can always add more if needed, but it’s harder to take away.
- Start with a small amount of product.
- Use a fluffy brush.
- Blend upwards and outwards.
Blending For A Flawless Finish
Blending is where the magic happens. A well-blended blush should look like it’s part of your skin, not just sitting on top of it. Use circular motions to blend the edges of the blush into your foundation. Pay attention to any harsh lines and soften them out. If you’re using powder blush, make sure your foundation is set with powder first, to avoid any patchiness. And if you’re using a cream blush, apply it before you set your foundation. It’s all about creating a seamless, natural gradient of color.
I remember one time, I didn’t blend my blush properly, and I went out looking like I had two bright pink circles on my face. My friend pointed it out, and I was so embarrassed! Now, I always double-check my blending in natural light before leaving the house. It’s a game-changer.
Finishing Touches For A Lasting Look
Okay, so you’ve nailed the 90s makeup, right? Now, how do you make sure it lasts longer than your average Tamagotchi battery? Here’s the lowdown on making it stick.
Setting Your Makeup With Spray
Setting spray is your best friend. Seriously. After all that work, you don’t want your masterpiece sliding off your face by lunchtime. Grab a setting spray – matte finish is super 90s – and mist it all over your face. Hold the bottle about six inches away and spray in a “T” shape, then an “X” shape to make sure you get every spot. This helps everything meld together and keeps it from creasing or fading. Think of it as hairspray, but for your face. You can even find organic products that are good for your skin.
Using Setting Powder Effectively
Setting powder is another key player. It soaks up excess oil and helps to keep your makeup in place. But don’t go overboard! Too much powder can make you look cakey, and nobody wants that. Here’s the deal:
- Use a fluffy brush.
- Tap off the excess powder.
- Lightly dust it over your T-zone (forehead, nose, and chin) and any other areas that tend to get oily.
A little goes a long way. Focus on areas where makeup tends to crease, like under your eyes and around your mouth. Press the powder in gently with a damp makeup sponge for extra staying power.
Tips For Touching Up Throughout The Day
Even with the best setting techniques, life happens. Here are some quick tips for touch-ups:
- Blotting Papers: Keep these in your bag to soak up oil without disturbing your makeup. Press, don’t rub!
- Lipstick: Reapply after eating or drinking. A quick swipe can make a huge difference.
- Concealer: If you notice any creasing under your eyes, gently blend it out with your finger and add a tiny bit of concealer.
Basically, a little maintenance goes a long way. Don’t be afraid to check your makeup in the mirror and make small adjustments as needed. Rock that 90s look all day long!

Exploring 90’s Subculture Makeup Styles
The 90s weren’t just about one look; different subcultures had their own distinct makeup vibes. Let’s take a trip back and check out some of the most memorable.
Grunge Makeup Essentials
Grunge makeup was all about that effortless, lived-in look. Think less “I just woke up like this” and more “I haven’t slept in three days and I’m rocking it.” Key elements included:
- Smudged eyeliner (the messier, the better)
- Dark, matte eyeshadows (browns, grays, and purples were your friends)
- Minimal foundation (or just let your skin’s natural texture shine through)
- A touch of dark lipstick or lip liner (brown or berry shades)
The goal wasn’t perfection; it was about expressing a raw, rebellious attitude. It was the antithesis of the polished, put-together looks that dominated earlier decades.
Rave Makeup Vibrancy
On the opposite end of the spectrum, rave makeup was all about bright colors and bold statements. This was the time to experiment and go wild. Key elements included:
- Neon eyeshadows (pinks, greens, blues, and yellows)
- Glitter, glitter, and more glitter (on your eyes, cheeks, and even hair)
- Bold eyeliner (think graphic shapes and bright colors)
- Bright lipstick or lip gloss (anything that catches the light)
Pop Star Glam Looks
Pop star makeup in the 90s was a mix of glam and girl-next-door. It was polished, but still fun and approachable. Key elements included:
- Matte foundation (for a flawless base)
- Neutral eyeshadows (browns, beiges, and peaches)
- Defined eyebrows (but not too thin!)
- Lip liner and lipstick (usually in a matching shade of pink or nude)
- A touch of blush (for a healthy glow)
It was all about looking put-together and camera-ready, but still relatable. Think classic beauty with a 90s twist.
Accessorizing Your 90’s Makeup Look

Choosing The Right Jewelry
When rocking an Easy 90’s makeup routine for a classic throwback look, the right jewelry can really pull everything together. Think about what was popular back then: chokers, especially the stretchy tattoo kind, were huge. Simple silver hoops or small studs are always a good choice. Don’t be afraid to layer necklaces, but keep them delicate. A chunky chain can also work, depending on the vibe you’re going for. The goal is to complement, not overwhelm, your makeup.
Incorporating Hair Accessories
Hair accessories were a big deal in the 90s. Scrunchies, butterfly clips, and headbands were everywhere. A high ponytail with a scrunchie is a classic look. Butterfly clips can add a playful touch, especially if you’re going for a more fun, less serious vibe. Headbands, whether thin or wide, can help frame your face and complete your look. Don’t be afraid to experiment with different colors and textures to find what works best for you. Accessorizing your hair can really elevate your Retro 90’s bold lip look.
Finding The Perfect Outfit
Your outfit is the final piece of the puzzle. The 90s were all about mixing and matching different styles.
Think about pairing a baby tee with high-waisted jeans or a slip dress with combat boots. Overalls were also a popular choice. Don’t be afraid to add a flannel shirt around your waist for that grunge-inspired look. The key is to have fun and express your personal style. Ultimately, the best outfit is one that makes you feel confident and comfortable.
Here are some outfit ideas:
- High-waisted jeans with a crop top
- Slip dress with a cardigan
- Overalls with a t-shirt
- A plaid skirt with a band tee
Wrapping It Up: Your 90’s Makeup Journey
So there you have it! You’re all set to rock that 90’s makeup vibe. Remember, it’s all about having fun and expressing yourself. Whether you’re going for that grunge look or something more rave-inspired, just keep it playful. Don’t stress too much about perfection; the 90’s were all about being bold and a little messy. Grab your favorite products, put on some nostalgic tunes, and let your creativity flow. You’ll be turning heads in no time, channeling those iconic 90’s vibes with confidence!

Frequently Asked Questions
What were popular makeup trends in the 90s?
In the 90s, makeup trends included matte skin, brown lip liner with lipstick, frosted eyeshadow, and thin eyebrows. Dark lip colors and body glitter were also popular.
How do I achieve a perfect matte base for 90s makeup?
To get a matte base, choose a foundation that matches your skin tone and has a matte finish. Apply it evenly, blending well, and set it with translucent powder.
What colors should I use for 90s eye makeup?
For eye makeup, use neutral shades like browns and beiges for a smokey eye. You can also try bright colors like blues or purples for a fun twist.
How can I make my lipstick last all day?
To make your lipstick last, first outline your lips with a lip liner, then fill them in with lipstick. Blot with a tissue to set the color.
What type of blush is best for a 90s look?
Choose a warm-toned blush in shades like peach or terracotta. Apply it lightly on the apples of your cheeks and blend it out for a natural look.
How do I keep my makeup looking fresh throughout the day?
Use a setting spray after applying your makeup to keep it in place. You can also carry some powder for touch-ups during the day.

Very interesting information!Perfect just what I was searching for!
Trong quá trình trải nghiệm bet thủ chắc chắn sẽ cảm thấy thích thú và dành chiến thắng dễ dàng bởi hệ thống tính năng hỗ trợ được thiết kế đầy đủ. Mỗi siêu phẩm săn thưởng còn được cung cấp bí kíp riêng giúp bạn tối ưu chiến thắng nhanh chóng từ chuyên gia. 888slot trang chủ Người chơi có thể tham khảo và lựa chọn sử dụng nếu cảm thấy phù hợp. TONY12-24