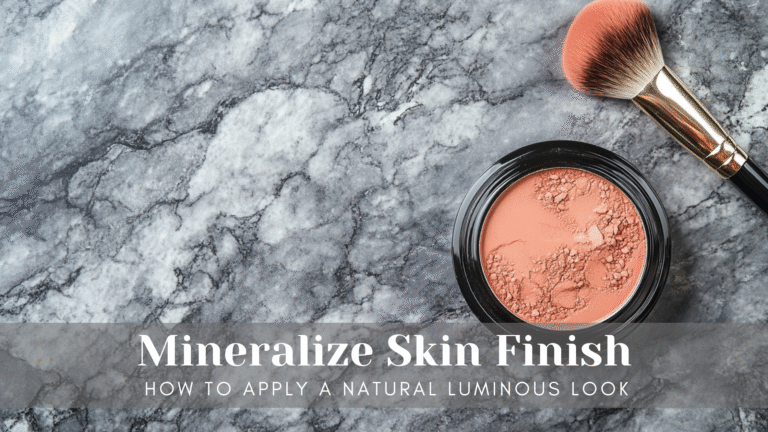
The seasons change, and so does our skin, often leaving it feeling dry and makeup application a challenge. If you’re tired of your foundation looking cakey or your blush clinging to dry patches, you’re not alone. Dealing with a makeup dessert dry weather situation can feel impossible, but with the right approach, you can achieve a smooth, hydrated, and radiant look year-round. This guide is packed with tips from experts to help you navigate the complexities of makeup for dry skin.
Key Takeaways
- Understand how seasonal shifts impact your skin barrier and hydration levels.
- Prioritize skin prep with gentle cleansers, hydrating moisturizers, and smoothing primers.
- Choose liquid or serum foundations and cream-based color products to avoid dryness.
- Master application techniques like patting and pressing to ensure even coverage without irritation.
- Opt for hydrating setting sprays and strategically placed highlighters for a luminous finish.
Understanding How Seasonal Changes Affect Your Skin
Why Dry Weather Impacts Makeup Application
Ever notice how your makeup just doesn’t sit right when the weather turns dry and chilly? It’s not just in your head. Rapid shifts in temperature and humidity can really throw your skin for a loop. Think of your skin like it’s trying to adapt to a new environment, and sometimes, it struggles to keep enough moisture in.
This can lead to tiny cracks in your skin’s outer layer, making it lose hydration and become a bit inflamed. When this happens, your skin barrier, which is supposed to protect you from all sorts of outside stuff and keep moisture locked in, gets a little compromised. And when that barrier isn’t happy, makeup application can become a real challenge, leading to that dreaded cakey or flaky look. It’s like trying to paint on a surface that’s too dry – things just don’t go on smoothly.
Signs Your Skin Barrier Is Compromised
So, how do you know if your skin barrier is feeling the dry weather blues? Well, there are a few tell-tale signs. Your skin might feel tight, even after you’ve moisturized. You might notice more redness or irritation than usual, especially when you apply products. Flakiness and a rough texture are also big indicators.
Sometimes, it can even feel itchy or sensitive to things it normally tolerates. If your makeup starts to look patchy or just won’t blend properly, that’s another clue. It’s your skin telling you it needs a little extra TLC to get back to its healthy, protected state. A compromised barrier means your skin is more open to irritation and less able to hold onto hydration, which is exactly what we don’t want when trying to apply makeup.
Maintaining Skin Hydration All Season Long
Keeping your skin hydrated through dry spells is key to makeup success. It starts with your daily routine. When you wash your face, use lukewarm water instead of hot, and opt for a gentle cleanser that won’t strip away your skin’s natural oils. After washing, gently pat your skin dry – no rubbing! – and immediately follow up with a good moisturizer. Layering your skincare can also make a big difference. Consider using a hydrating serum before your moisturizer.
And don’t forget about humidifying your home; using a humidifier can add much-needed moisture back into the air, especially during winter when heating systems tend to dry everything out. Drinking plenty of water is also super important; hydration really does start from within. Making these small changes can help your skin stay plump and happy, making makeup application so much easier. Remember to also protect your skin from the sun, even on cloudy days, as UV rays can still contribute to dryness and damage. Using a sunscreen with ingredients like Titanium Dioxide can offer protection and also help calm the skin protect your skin.
Taking care of your skin barrier isn’t just about looking good; it’s about keeping your skin healthy and resilient against environmental stressors. A strong barrier means less irritation and better makeup application.
Essential Skin Prep Before Applying Makeup

Getting your skin ready before you even think about foundation is a big deal, especially when the air is drier than a forgotten cracker. It’s not just about slapping on some moisturizer; it’s about creating a welcoming surface for your makeup. Think of it like preparing a canvas before you paint – you wouldn’t just start slapping paint on a dusty, bumpy surface, right? The same goes for your face. A good prep routine can make the difference between makeup that looks fresh all day and makeup that starts to flake off by lunchtime.
Choosing the Right Cleanser for Dry Weather
When it comes to cleansing, ditch anything that feels like it’s stripping your skin. Harsh cleansers can mess with your skin’s natural oils, which you desperately need when it’s dry out. Instead, look for gentle, hydrating formulas. Ingredients like glycerin, hyaluronic acid, and ceramides are your best friends here. They help clean your skin without taking away all the good stuff. You want a cleanser that leaves your skin feeling soft and comfortable, not tight and squeaky.
- Look for cream or oil-based cleansers. These are generally more moisturizing.
- Avoid sulfates and alcohol. These can be really drying.
- Consider your skin’s pH. Ideally, a cleanser should have a pH close to your skin’s natural pH (around 4.7) to avoid disrupting its balance.
A cleanser that respects your skin’s natural barrier is key. It should clean without stripping, leaving your skin ready for the next steps.
The Importance of Moisturizing Layers
Moisturizing is non-negotiable, but for dry weather, it’s about layering. Start with a good, hydrating serum. Serums are lighter and can penetrate deeper into the skin to deliver moisture. After the serum has had a moment to sink in, follow up with a richer moisturizer. This acts like a seal, locking in all that hydration from the serum. Don’t forget your neck and décolletage – they get dry too!
- Apply serum to damp skin. This helps it absorb better.
- Use a thicker cream for your final layer. Look for ingredients like shea butter or squalane.
- Give each layer time to absorb. Rushing this step can make makeup application tricky.
Priming Techniques for a Smooth Makeup Base
Primer is your secret weapon against dry, patchy makeup. For dry skin, you want a hydrating primer. These often have a creamy texture and can contain ingredients that add an extra boost of moisture. Apply it evenly across your face, paying attention to areas where makeup tends to cling or look dry. Some primers even have a subtle glow, which can give your skin a lovely luminosity before you even apply foundation. This step is part of a solid makeup routine for dry skin environments.
- Hydrating primers are a must. Look for terms like ‘hydrating,’ ‘luminous,’ or ‘moisture-boosting.’
- Apply with your fingertips. This helps warm up the product and blend it smoothly.
- Focus on areas that need it most. If you have particularly dry spots, give them a little extra attention.
Choosing the Best Foundation for Dry Conditions
Dry, arid weather can turn regular makeup routines upside down. The right foundation can mean the difference between a smooth, luminous look and an uneven, flaky mess. Let’s break down what to look for when hunting for the best makeup for dry climates and how to keep makeup fresh in dry weather.
Liquid and Serum Foundations: What Works
When your skin feels parched, ditch heavy matte foundations—they only tighten up and draw attention to dry areas. Instead, go for these options:
- Liquid foundations: Look for terms like “hydrating” or “luminous.” These formulas are lighter, blend easier, and add moisture instead of sapping it away.
- Serum foundations: These often contain ingredients such as hyaluronic acid or squalane, offering extra hydration and helpful antioxidants.
- Tinted moisturizers or BB creams: If you only want soft coverage and a real boost of hydration, these double up as a moisturizer and makeup.
Quick comparison table:
| Foundation Type | Coverage | Ideal Skin Type | Hydrating Effect |
|---|---|---|---|
| Liquid | Medium-full | Dry/Normal | Strong |
| Serum | Light-Medium | Dry/Normal | Strongest |
| Cream | Medium | Dry | Moderate-Strong |
| Powder | Sheer-Medium | Oily/Combo | Weak |
Avoiding Cakey and Flaky Finishes
Nothing ruins a look faster than patchy, cracking foundation. Avoid this with these hydrating makeup tips for arid skin:
- Exfoliate gently before applying makeup but don’t overdo it, or you’ll zap more moisture away.
- Use a damp sponge to press foundation into the skin. This technique gives sheer, even coverage without irritating flaky patches.
- Start with a little product and layer only where needed. Heavy layers sit on top and make dryness more visible.
When your skin already feels tight from the desert air, adding multiple thick makeup layers isn’t the answer. Thin, blended layers can actually last longer, especially with the right prep.
Tips for Color Matching in Dry Weather
Your skin tone can look a touch different in dry, bright conditions—sometimes a little duller or lighter because of built-up flakes. Here’s how to get the best match:
- Always test foundation in natural daylight, near a window if you can.
- In winter or intense dry weather, you might need a slightly richer or warmer tone to counteract paleness.
- If in doubt, blend two shades for your own custom match.
And don’t forget: products with SPF help for those sunny, dry days, too!
Remember, finding a long-lasting foundation for desert weather is mostly about hydration—both from your makeup and your skin routine. Look for friendly ingredients, take your time blending, and your skin won’t have to struggle to look its best.
Mastering Application Techniques for Flake-Free Makeup
Applying makeup when your skin feels like a desert can be a real challenge. You prep, you moisturize, but then the foundation starts to look patchy, and suddenly you’re sporting a flaky finish. It’s frustrating, I know. But don’t give up just yet! The way you apply your makeup can make a huge difference. It’s all about working with your dry skin, not against it.
Hands vs. Brushes vs. Sponges: What’s Best for Dry Skin
This is a question I get asked a lot, and honestly, there’s no single right answer. It really depends on the product and your personal preference. However, for dry skin, I often find that using your fingers can be a game-changer. The warmth from your hands helps to melt the product into your skin, creating a more natural, seamless finish. It’s like giving your foundation a little massage.
- Fingers: Great for warming up cream products and pushing them into the skin for a natural look. Just make sure your hands are clean!
- Brushes: A soft, dense brush can work well, especially for buffing in liquid or cream foundations. Just be careful not to over-buff, as this can sometimes lift dry patches. Always apply in one direction to avoid irritating the skin.
- Sponges: A damp sponge can be good for stippling or pressing product into the skin. However, be mindful that some sponges can absorb a lot of product, and if it’s too wet, it might dilute your foundation too much. A lightly damp sponge is usually best.
Patting and Pressing for Even Coverage
Whatever tool you choose, the technique is key. Instead of swiping or rubbing, focus on patting or pressing the product into your skin. This helps to build coverage gradually and avoids disturbing any dry patches. Think of it like gently dabbing a delicate surface. This method helps your makeup adhere better and look more natural, giving you that flawless finish you’re after.
Blending Without Aggravating Dry Patches
Blending is where many people with dry skin run into trouble. Aggressive blending can lift product and reveal dry, flaky areas underneath. The trick is to be gentle. Use light, tapping motions to blend the edges of your foundation, concealer, or cream products. If you’re using a brush, use the tip to feather out any harsh lines. For cream blushes or bronzers, a stippling motion works wonders to blend them in without disrupting your base. Remember, patience is a virtue here; take your time to blend softly and build up the color or coverage as needed.
When applying makeup on dry or peeling skin, be sure to apply it in one direction when using a brush or pressing technique with a makeup sponge. You don’t want to rub the brush around the face too much because that can cause friction, resulting in the skin peeling even more. Gentle application is the name of the game.

Strategic Use of Creams, Blushes, and Bronzers
Cream Formulas for a Dewy Finish
When the weather gets dry, your skin can start to feel a bit parched, and that’s where cream-based makeup products really shine. They tend to be more forgiving on dry patches than powders. Think of cream blushes and bronzers as your best friends for adding color and dimension without making your skin look flaky. They glide on smoothly and often have hydrating ingredients, which is a big win when your skin is feeling tight. Applying cream products is all about gentle patting and blending.
Applying Blush and Bronzer Without Dryness
It’s easy to get carried away with makeup trends, but when your skin is dry, you have to be a bit more mindful. Many makeup artists suggest sticking to cream formulas for blush and bronzer. They blend into the skin much better and don’t settle into those little dry patches that can pop up. If you really love powder products, that’s okay, but be smart about where you put them. Only apply powder where you actually need the color, and make sure it’s a finely milled formula. You don’t want anything that’s going to make your skin look even drier than it already is. Using your fingers or a slightly damp sponge can help the product meld with your skin, rather than sitting on top of it. For a smooth finish, try applying cream blush to the apples of your cheeks, then lightly dust a powder blush over it to set [bf5f].
Where to Place Color for a Natural Glow
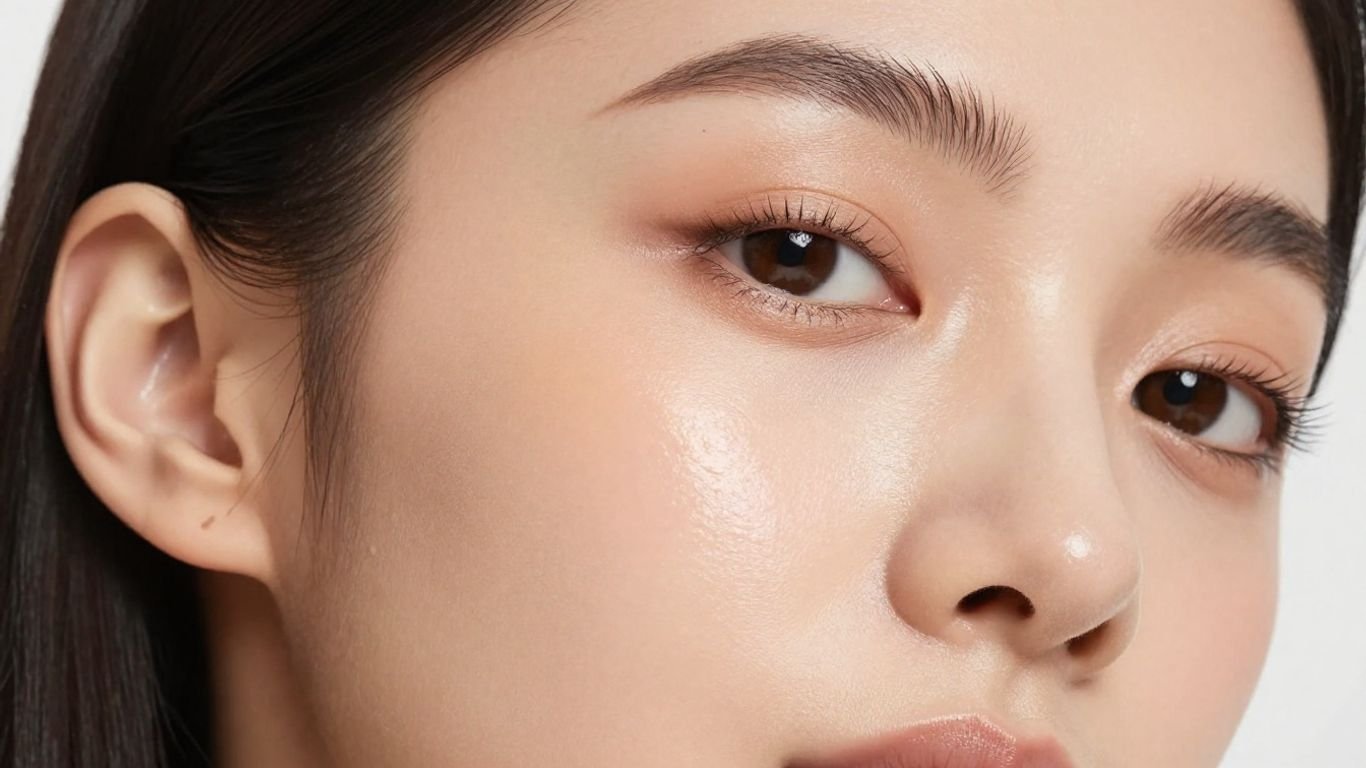
Placement is key to making blush and bronzer look natural, especially on dry skin. For blush, focus on the apples of your cheeks and blend upwards towards your temples. This gives a lifted effect and looks really fresh. With bronzer, think about where the sun would naturally hit your face – your forehead, cheekbones, and jawline. Lightly sweep it on to add warmth. A little bit of highlighter can also make a big difference. Try dabbing a cream or liquid highlighter on the tops of your cheekbones, just above where you’d put blush, and on your brow bone. This catches the light and gives your skin a lovely, healthy-looking glow. It’s like a little secret weapon against dullness.
When applying makeup, especially on dry skin, remember that technique matters. Avoid harsh rubbing motions with brushes, as this can irritate dry patches. Instead, opt for gentle pressing or patting motions to help the product adhere smoothly to your skin. This careful application helps maintain the skin’s moisture barrier and prevents makeup from looking cakey or patchy.
Smart Powder and Setting Solutions
Okay, so we’ve got our base looking good, but now comes the part where things can go a little sideways if you’ve got dry skin: powders and setting sprays. It’s easy to think that powder is the enemy of dry skin, and honestly, sometimes it feels that way. But it doesn’t have to be! The trick is to be super strategic about how and where you use them.
Setting Spray vs. Setting Powder
This is where a lot of people get confused. Setting sprays are generally your friend when your skin is feeling parched. They help meld all your makeup layers together, giving you a more natural, skin-like finish. Think of it as a final mist that makes everything look less like makeup and more like, well, you.
Powders, on the other hand, can be a bit trickier. They’re great for controlling shine and making makeup last longer, but they can also emphasize dryness and texture. If you absolutely need powder, especially in areas that tend to get a bit oily, go for something really finely milled. The goal is to set, not to mattify into oblivion.
Lightweight Powders for a Softer Look
If you’re going to use powder, choose wisely. Forget those heavy, full-coverage powders that can make your skin look like a desert landscape. Instead, look for lightweight, finely milled options. These will help absorb a little excess oil without making your skin look flat or chalky. You can use a big fluffy brush to lightly dust it over areas that tend to get shiny, like your T-zone. It’s all about a subtle touch.
How to Avoid Dull, Matte Completions
Matte finishes are often the biggest culprit when it comes to making dry skin look even drier. If you’ve applied a foundation that’s a bit too matte, or if you’ve gone a little heavy-handed with powder, don’t despair. A hydrating setting spray can often bring back some life and dewiness to your makeup. You can also strategically place a liquid or cream highlighter on the high points of your face after setting your makeup to bring back that luminous glow. It’s about balance, you know?
Here are a few things to keep in mind:
- Hydrating Setting Sprays: Look for sprays with ingredients like glycerin or hyaluronic acid. They add a boost of moisture while setting your makeup.
- Targeted Powder Application: Only apply powder where you absolutely need it. A small brush can help you pinpoint those areas.
- Creamy Formulas First: Whenever possible, opt for cream or liquid formulas for blush, bronzer, and highlighter, as they tend to play nicer with dry skin.
Remember, the skin barrier is super important for keeping moisture in. Using harsh products or too much powder can mess with that barrier, making dryness even worse. So, be gentle with your skin and your makeup choices.
For those humid days, you might want to check out some tips for makeup in hot climates, as the principles of keeping makeup in place without drying out your skin can sometimes overlap.
Lips and Finishing Touches: Avoiding the Dessert Effect
Prepping Lips for Hydration
Dry weather doesn’t just affect your face; your lips can feel like they’ve been through a sandstorm. Before you even think about lipstick, give your lips some serious TLC. Start with a gentle exfoliation to slough off any flaky bits. You can use a dedicated lip scrub or even a soft toothbrush with a bit of balm. After exfoliating, layer on a really hydrating lip balm. Think of it as a mini spa treatment for your pout. This prep work is key to preventing lipstick from looking cracked and dry.
Highlighters for a Luminous Finish
To bring back that healthy glow, strategically placed highlighter is your best friend. Forget powders that can cling to dry patches. Instead, opt for liquid or cream highlighters. Dot a small amount onto the high points of your face where light naturally hits: the tops of your cheekbones, the bridge of your nose, and your cupid’s bow. Gently tap and blend with your fingers or a damp sponge. This adds a beautiful, dewy sheen without emphasizing dryness. It’s like a little bit of magic to make your skin look alive and radiant, even when the air is sucking all the moisture out.
Sealing in Moisture Post-Makeup
Once your makeup is done, you might think you’re finished, but there’s one last step to lock in all that hard work and hydration. Setting sprays are a lifesaver for dry skin. Look for formulas labeled ‘hydrating’ or ‘dewy.’ A good setting spray not only helps your makeup last longer but also melts powders into the skin, giving you a more natural, skin-like finish. It’s like a refreshing mist that brings everything together and adds that final touch of moisture.
Don’t underestimate the power of a good setting spray. It can be the difference between makeup that looks dry and cakey and makeup that looks fresh and radiant all day long. It’s a simple step that makes a big impact.
Here’s a quick rundown of what to focus on:
- Lip Care: Always prep lips with balm before color.
- Highlighter: Use liquid or cream formulas on high points.
- Setting Spray: Opt for hydrating formulas to finish.
Remember, the goal is to mimic healthy, hydrated skin, not to add more dryness. With these final touches, your makeup will look as good as it feels, no matter how dry the weather gets. For more tips on building a makeup collection that works for you, check out this guide to essential products.
Your Skin Can Handle the Dry Spell
So, dealing with dry skin during the colder months doesn’t have to be a constant battle. We’ve gone over how to prep your skin, pick the right products, and even how to apply them so they don’t make things worse. Remember, keeping your skin hydrated is the main thing. With these tips, you can actually enjoy wearing makeup again, even when the air is super dry. Your face will look and feel so much better, and you won’t have to worry about that tight, flaky feeling anymore. Go ahead and put your best face forward, no matter the weather.

Frequently Asked Questions
Why does makeup look different on my skin when the weather gets dry?
Dry weather can make your skin feel tight and look flaky. This is because the cold air and less humidity pull moisture away from your skin. When you put makeup on, it can stick to these dry spots, making them look more noticeable and causing your makeup to appear cakey or patchy.
What’s the best way to prepare my skin for makeup during dry seasons?
The key is to add as much moisture as possible! Start by gently cleansing your face to remove dead skin cells. Then, apply a rich moisturizer, focusing on any dry areas. Using a hydrating primer can also create a smooth canvas for your foundation, helping your makeup go on evenly and last longer.
Should I use liquid or powder foundation when my skin is dry?
Liquid or serum foundations are usually best for dry skin. They tend to be more hydrating and blend more smoothly, giving your skin a dewy look. Powder foundations can sometimes settle into dry patches and make them look more obvious, so it’s often better to stick with creamy formulas.
How can I apply blush and bronzer without making my dry patches worse?
Cream blushes and bronzers are your best friends! They glide onto the skin easily and add a natural flush of color without emphasizing dryness. If you prefer powders, use a very light hand and apply them only where you need a touch of color, making sure to blend well.
What’s the difference between setting spray and setting powder for dry skin?
Setting sprays are generally better for dry skin because they add a dewy finish and help meld your makeup together. Setting powders can sometimes look too matte or dry, making any flaky areas stand out. If you do use powder, choose a very finely milled one and apply it sparingly only where needed.
How can I make my lips look good when they’re dry and chapped?
Before applying any lipstick, gently exfoliate your lips to remove dry skin. Then, apply a hydrating lip balm or a creamy lipstick. Avoid very matte formulas, as they can make your lips look even drier. A touch of lip gloss can also add a nice, hydrated finish.