I don’t know about you, but I feel like I go through store-bought dry shampoo way too fast. It’s also kind of expensive, and honestly, some of the smells are just too much. I’ve been making my own for years, and it’s super easy. You probably have most of the stuff in your kitchen already. It’s a simple powder that soaks up oil and makes your hair feel fresher. Plus, you can totally tweak it to match your hair color, which is pretty neat. It even adds a bit of texture, making fine hair feel fuller.
Key Takeaways
- You can easily make your own dry shampoo at home using common kitchen ingredients like cornstarch, baking soda, and cocoa powder.
- Adjusting the amount of cocoa powder or adding ingredients like activated charcoal can help the dry shampoo blend with different hair colors, from light to dark.
- Applying the dry shampoo with a makeup brush offers more control and prevents clumping, leading to a more natural look.
- Baking soda can help neutralize any odors that might come with oily hair, keeping it smelling fresh.
- Homemade dry shampoo is a cost-effective and customizable alternative to commercial products, allowing you to avoid unwanted chemicals and scents.
Crafting Your Perfect Dry Shampoo Blend
Making your own dry shampoo is surprisingly simple, and honestly, way more cost-effective than buying the aerosol cans. Plus, you get to control exactly what goes onto your scalp. It’s all about finding the right mix for your hair type and color.
The Base Ingredients for Oil Absorption
The core of any good dry shampoo is a powder that can soak up excess oil. Most people start with either cornstarch or arrowroot powder. Both are super absorbent and readily available. Cornstarch is a kitchen staple, while arrowroot powder is a bit finer and can feel lighter on the hair. You can even mix them if you want!
Customizing for Light Hair Tones
If you have lighter hair, you’re in luck! The basic blend of cornstarch or arrowroot powder, maybe with a touch of baking soda to help with odor, is usually enough. You don’t need to add any colorants, so you avoid that chalky white residue that can happen with some store-bought options. Just a simple mix is often all you need to refresh your roots between washes. It’s a great way to add a little texture to fine hair too.
Enhancing for Darker Hair Shades
For those with darker hair, the trick is to avoid that ghostly white cast. This is where cocoa powder comes in. Unsweetened cocoa powder is your best friend here. You’ll want to add it gradually to your base powder until you get a shade that blends in with your natural hair color. It might take a little experimenting to get the shade just right, but it’s totally doable. Some people even use a tiny bit of activated charcoal for very dark hair, but be careful, a little goes a long way!
Getting the color right is key to making your DIY dry shampoo look natural. Start with a small amount of coloring agent and add more as needed until it disappears into your hair.
Here’s a basic idea of how you might adjust for different hair colors:
| Hair Color | Base Powder (e.g., Cornstarch) | Coloring Agent (e.g., Cocoa Powder) | Other Additions (Optional) | Ratio Example (Parts) |
|---|---|---|---|---|
| Light Blonde | 4 | 0 | 4:0 | |
| Medium Blonde | 4 | 1/4 | 4:0.25 | |
| Light Brown | 4 | 1/2 | 4:0.5 | |
| Medium Brown | 4 | 1 | 4:1 | |
| Dark Brown/Black | 4 | 2-3 | Pinch of Charcoal | 4:2-3 |
Remember, these are just starting points. You can always adjust the amounts based on your specific hair shade. It’s all about finding that perfect match. You can find more tips on creating your own natural makeup products online.

Essential Components of Homemade Dry Shampoo
So, you want to whip up your own homemade hair refresher? That’s awesome! Making your own dry shampoo is pretty straightforward, and it really comes down to a few key players. These ingredients are what make the magic happen, absorbing that extra oil and giving your hair a new lease on life between washes.
Cornstarch or Arrowroot Powder
This is your workhorse. Both cornstarch and arrowroot powder are fantastic at soaking up oil. They’re super fine powders, which means they can get right in there and grab onto the grease without leaving your hair feeling heavy. For lighter hair colors, these are often all you need as your base. They’re gentle and readily available, making them a go-to for any DIY beauty project.
The Role of Baking Soda
Baking soda is a bit of a multitasker in this recipe. While it also absorbs oil, its real superpower is its ability to help neutralize odors. You know that slightly funky smell hair can get after a day or two? Baking soda tackles that head-on, leaving your hair smelling fresher. Just a little bit goes a long way, so you don’t need a ton of it.
Color Adjustments with Cocoa Powder
This is where things get really customizable, especially if you have darker hair. Plain cornstarch or arrowroot can leave a white cast on brown or black hair, which isn’t exactly the look we’re going for. Unsweetened cocoa powder is the secret weapon here. It adds a natural tint that blends right in, making your dry shampoo virtually invisible. The amount you use will depend on your hair color – start with a little and add more until you get a good match. It’s like a little bit of hair magic!
Remember, the goal is to absorb oil and refresh your hair, not to add a noticeable color unless that’s your intention. Getting the ratios right is key to a natural-looking finish.
Here’s a basic starting point for a light-haired friend:
- 1/4 cup cornstarch or arrowroot powder
- 1 tablespoon baking soda
For darker hair, you’ll want to add cocoa powder. A good starting point might be:
- 2 tablespoons cornstarch or arrowroot powder
- 1 tablespoon cocoa powder
- 1 teaspoon baking soda (optional, for odor control)

Achieving a Natural Dry Shampoo
Making your own dry shampoo is surprisingly simple, and honestly, way better for your hair than those aerosol cans. You know, the ones with ingredients you can barely pronounce? We’re talking about a truly natural oil absorber for hair here, using things you probably already have in your kitchen. It’s a fantastic way to get a quick hair cleansing spray when you’re short on time, offering a DIY hair oil control solution that’s gentle and effective.
Avoiding Unwanted Tints
One of the biggest hurdles when making your own dry shampoo, especially for darker hair, is avoiding that chalky, white residue. Nobody wants to look like they’ve been dusted with flour! The trick is in the color adjustment. For lighter hair tones, plain cornstarch or arrowroot powder usually does the job perfectly. However, if you have medium to dark hair, you’ll want to add a bit of unsweetened cocoa powder. Start with a small amount and gradually add more until it closely matches your hair color. This simple step makes a huge difference in how natural your homemade dry shampoo looks and feels. It’s all about finding that perfect shade to blend in.
The Benefits of Natural Ingredients
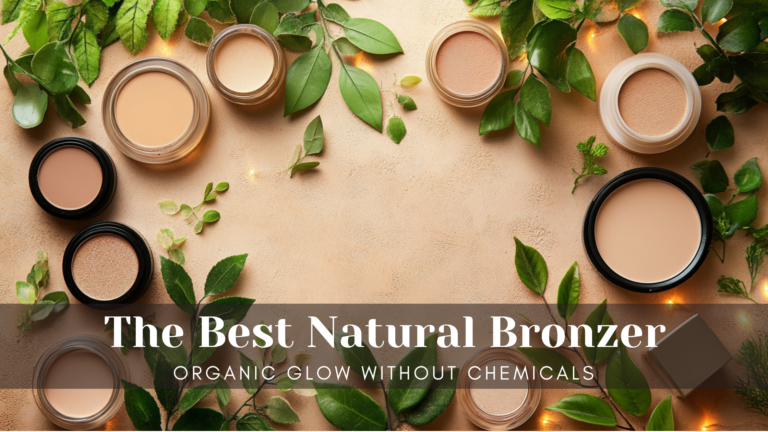
Using kitchen staples like cornstarch, arrowroot powder, and cocoa powder means you’re avoiding harsh chemicals often found in commercial products. These natural ingredients are gentle on your scalp and hair, plus they’re incredibly budget-friendly. Think about it: you’re getting a homemade no-wash hair solution that’s not only effective but also kind to your body and your wallet. Plus, you can control exactly what goes into it, which is always a win. It’s a great way to achieve that clean feeling without the fuss or the questionable additives. You can even find natural bronzers that use similar ingredients for a subtle glow natural glow.
Understanding Ingredient Ratios
Getting the ratios right is key to a successful DIY dry shampoo. A good starting point for lighter hair is a base of 1/4 cup cornstarch or arrowroot powder mixed with 1 tablespoon of baking soda. Baking soda can help neutralize odors, which is a nice bonus.
For darker hair, you’ll add cocoa powder to this base. A common ratio to start with is 2 tablespoons of cocoa powder for every 1/4 cup of cornstarch, but you’ll want to adjust this based on your specific hair color. It might take a little trial and error to find your perfect blend, but it’s worth it. Remember, you can always add more cocoa powder if the mixture is too light, but you can’t take it away if it’s too dark!
The beauty of making your own dry shampoo lies in its adaptability. You’re not tied to a single formula. Experimenting with ratios and ingredients allows you to create a product that truly works for your unique hair type and color, making it a personalized hair care experience.
Application Techniques for Dry Shampoo
So, you’ve whipped up your perfect DIY dry shampoo blend. Awesome! Now comes the part where you actually use it. Getting it right makes all the difference between refreshed hair and, well, powdery-looking hair. It’s not complicated, but a few tricks can really help.
Using a Makeup Brush for Precision
Forget just shaking it on. Using a clean makeup brush, like an old fluffy powder brush or a dedicated kabuki brush, is a game-changer. It lets you target just the oily spots without dumping a ton of powder everywhere. You can “paint” the powder right onto your roots where you need it most. This method gives you way more control, stopping those dreaded white patches that can make your hair look a bit like a wig.
Gentle Application to Roots
When you apply the powder, be gentle. You want to deposit the product onto the scalp and roots, not scrub it in aggressively. Think of it as dusting, not buffing. If you’re using a brush, tilt your head forward a bit so gravity helps you get to the roots. If you’re using a shaker or your fingers, try to get the powder as close to the scalp as possible without touching your hair strands too much.
Blending for a Seamless Finish
After you’ve applied the dry shampoo, give it a minute or two to do its thing and absorb the oil. Then, it’s time to blend. You can use your fingertips to gently massage the product into your scalp. This helps break up any powder clumps and distributes it evenly. If you still see any powdery residue, a quick brush-through with your regular hairbrush should do the trick. For styled hair, a light tousle with your fingers is often all you need to make it disappear.
Exploring Variations in Dry Shampoo Recipes
So, you’ve got the basic dry shampoo down, but what if you want to switch things up a bit? There are actually a few ways you can tweak your homemade blend to make it even better suited for your hair or just to add a little something extra. It’s all about playing with the ingredients to get the results you want.
Adding Activated Charcoal for Deep Tones
If you have really dark or black hair, you might find that even with cocoa powder, your dry shampoo still leaves a bit of a lighter cast. That’s where activated charcoal comes in. Just a tiny bit can make a big difference in darkening your blend to match your hair color more precisely. It’s a great way to avoid that powdery look that can sometimes happen with lighter bases. Remember, a little goes a long way with charcoal, so start small and add more if needed. You can find it at most health food stores or online.
Incorporating Essential Oils for Scent
While many store-bought dry shampoos smell like a perfume factory exploded, you can add a subtle, natural scent to your DIY version with essential oils. Lavender is a popular choice because it’s calming and good for your scalp, but you could also try peppermint for a refreshing feel or rosemary for hair growth benefits. Just a few drops are usually enough. Be mindful that if you’re using cocoa powder, its chocolatey aroma might overpower lighter essential oils, so consider that when choosing your scent. If you’re looking for ways to care for color-treated hair, some essential oils can be beneficial.
The Wet-Dry Shampoo Alternative
This one’s a bit different, but some people like to create a sort of “wet-dry” shampoo. Instead of just powders, you might mix your absorbent powders with a bit of water or witch hazel to create a paste or a very thick liquid. You’d then apply this to your roots, let it dry, and then brush it out. It’s a less common approach, but it can be effective for really absorbing oil. It’s a bit more involved than the powder method, but it’s an interesting variation to consider if you’re feeling adventurous.
Making your own dry shampoo is a fantastic way to control the ingredients and customize it for your specific hair needs. Don’t be afraid to experiment with different ratios and additions to find what works best for you. It’s a simple process that can save you money and keep your hair looking fresh between washes.
Storing and Maintaining Your Dry Shampoo
So you’ve whipped up a batch of your own dry shampoo – nice job! Now, how do you keep it fresh and ready to go for those in-between wash days? It’s pretty simple, really. The key is to keep it sealed up tight. This stops any moisture from getting in, which could make your powders clump up. Think of it like keeping your flour or sugar fresh; you wouldn’t leave those out on the counter, right?
Airtight Containers for Freshness
When it comes to storage, you’ve got options. Many people find that old spice jars work perfectly. They often have shaker tops, which makes application a breeze. Just make sure the lid seals well. If you don’t have a spice jar handy, any small container with a secure lid will do. Mason jars with tight-fitting lids are great, or even a small plastic container with a snap-on top. The goal is to prevent air and humidity from interacting with your dry shampoo blend. This helps maintain the powder’s absorbency and prevents any funky smells from developing.
Spice Jar Application Method
Using a spice jar is a really popular method for a reason. It gives you a lot of control over how much product you use. You can just shake a little bit directly onto your roots. Some people even prefer to use a clean makeup brush, like a fluffy powder brush or a kabuki brush, to pick up the powder from the jar and apply it precisely to the scalp. This method is fantastic for targeting specific oily areas without getting powder all over your hair. It’s a bit more controlled than just shaking it out, and it really helps with blending.
Ensuring Longevity of Your Blend
Your homemade dry shampoo should last quite a while if stored properly. Since it’s just dry powders, it doesn’t really spoil. However, over time, the ingredients might settle, or if any moisture gets in, it could affect the texture. Keeping it in a cool, dry place, like a bathroom cabinet, is usually fine. Just give it a good shake before each use to remix the ingredients.
If you notice any strange smells or clumping, it’s probably time to make a fresh batch. It’s always a good idea to label your container with the date you made it, just so you have an idea of how long it’s been around. This way, you can keep track of its freshness and know when it might be time to whip up a new batch, perhaps trying out some new scent combinations or adjusting your color match. For those with wavy hair, keeping your scalp healthy is also important, and a good dry shampoo can help manage oiliness between washes, contributing to overall hair health. maintaining scalp health is key.
Wrapping Up Your DIY Dry Shampoo Journey
If you don’t always have time for a full wash day, dry shampoo is a quick and effective fix. It works by absorbing excess oil, adding a touch of volume, and instantly refreshing your style—no water needed. Whether you’re in a rush, traveling, or just looking for an easy way to stretch your hairstyle, it’s a convenient alternative to traditional shampooing.
So there you have it! Making your own dry shampoo is pretty straightforward, using stuff you likely already have in your kitchen. It’s a great way to save a bit of cash and skip out on those strong smells or questionable chemicals found in some store-bought options. Plus, you can totally tweak the recipe to match your hair color, whether you’re rocking blonde, brown, or something else entirely. Give it a try – you might be surprised at how well it works to freshen up your hair between washes. It’s a simple fix that can make a real difference in your hair care routine.

Frequently Asked Questions
What are the main ingredients for homemade dry shampoo?
The most common ingredients are cornstarch or arrowroot powder, which soak up oil. Baking soda is often added to help with smells. For darker hair, cocoa powder is used to match your hair color.
How do I make dry shampoo for light-colored hair?
For light hair, you can simply mix cornstarch or arrowroot powder with a little baking soda. You can skip the cocoa powder altogether to avoid any tinting.
How can I adjust the dry shampoo for dark hair?
To make it work for dark hair, add unsweetened cocoa powder gradually to the cornstarch or arrowroot mixture. Keep adding it until the powder’s color closely matches your hair shade, so it blends in without leaving a white cast.
What’s the best way to apply homemade dry shampoo?
Using a fluffy makeup brush, like a kabuki brush, is the best way to apply it. Dip the brush into the powder, tap off any extra, and gently ‘paint’ it onto your roots and oily areas. Then, lightly massage it in with your fingers.
Can I add scents to my DIY dry shampoo?
Yes, you can add a few drops of your favorite essential oils for a nice scent. However, be aware that the smell of cocoa powder, if you use it, might overpower the essential oils.
How should I store my homemade dry shampoo?
Store your dry shampoo in an airtight container, like a spice jar with a shaker top or a small jar with a tight lid. This keeps it fresh and makes it easy to apply.


Baccarat strategy is fascinating – it’s about calculated risks, not just luck! Seeing platforms like bossjl app casino elevate the experience with secure, curated games is impressive. That “rite of entry” sounds smooth too! 🧐
Interesting points! Fund management is key, even in entertainment. Seeing platforms like no1jl club adapt to cultural preferences-like in the Philippines-is smart. Secure onboarding is crucial for trust, too!
Wow! This could be one particular of the most helpful blogs We’ve ever arrive across on this subject. Basically Wonderful. I am also a specialist in this topic so I can understand your hard work.
**mind vault**
mind vault is a premium cognitive support formula created for adults 45+. It’s thoughtfully designed to help maintain clear thinking