Ever tried a new skincare product and ended up with a face full of red splotches? Yeah, not fun. That’s why patch testing is a lifesaver. It’s like a little preview of how your skin might react to something new before you go all in. And trust me, it’s way better to find out on a tiny patch of skin than on your whole face. Patch testing helps you dodge those annoying allergic reactions and keeps your skin happy and healthy. So, let’s dive into how you can make patch testing a regular part of your skincare routine.
Key Takeaways
- Patch testing helps prevent allergic reactions to new skincare products.
- Choose a small, discreet area of skin for testing, like the inside of your elbow.
- Apply a small amount of product and wait 24 hours to check for any reactions.
- Look out for redness, itching, or swelling as signs of a reaction.
- Patch testing is crucial for products with active ingredients like retinol or acids.
Understanding the Importance of Patch Testing

Why Patch Testing is Crucial for Skin Health
Patch testing is like a safety net for your skin. Before you dive headfirst into using a new skincare product, it’s wise to test it out first. This process helps you avoid any nasty surprises, like redness or irritation. With so many chemicals packed into our daily skincare routines, patch testing becomes a must-do step. It helps you figure out if a product will be a friend or foe to your skin.
Common Reactions Detected by Patch Tests
When you patch test, you’re on the lookout for a few key signs:
- Redness or inflammation
- Itching or a burning sensation
- Rash or hives
These signals mean your skin isn’t happy with the product. It’s like your skin’s way of waving a red flag saying, “Nope, not this one!”
The Role of Patch Testing in Preventing Allergies
Patch testing is all about keeping your skin safe from allergic reactions. By testing a small area first, you can prevent a full-blown reaction. This is especially important if you have sensitive skin or known allergies. It’s a simple step that can save you a lot of discomfort and worry.
Patch testing is your skin’s best defense against unexpected reactions. It’s a small effort for big peace of mind.
So, before you slather on that new cream or serum, give patch testing a go. Your skin will thank you for it. And remember, when it comes to mixed skin, a tailored approach is key for maintaining balance and harmony.
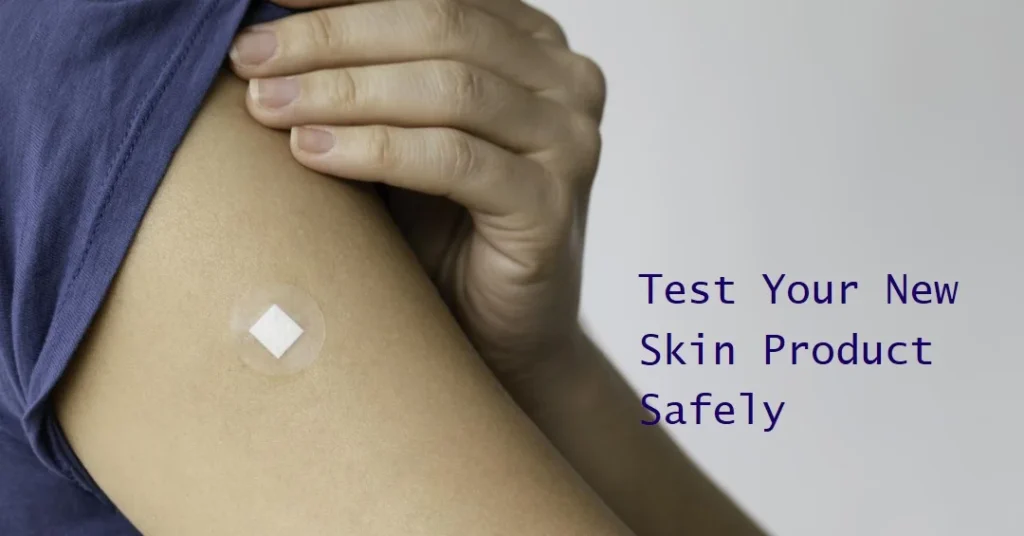
Step-by-Step Guide to Performing a Patch Test
Choosing the Right Area for Testing
When you’re about to try a new skin product, finding the right spot for a patch test is key. Opt for areas that are easy to reach and less likely to be disturbed. The inside of your elbow or behind your ear are popular choices. These spots are not only convenient but also sensitive enough to give you a clear idea of how your skin might react.
How to Apply the Product Correctly
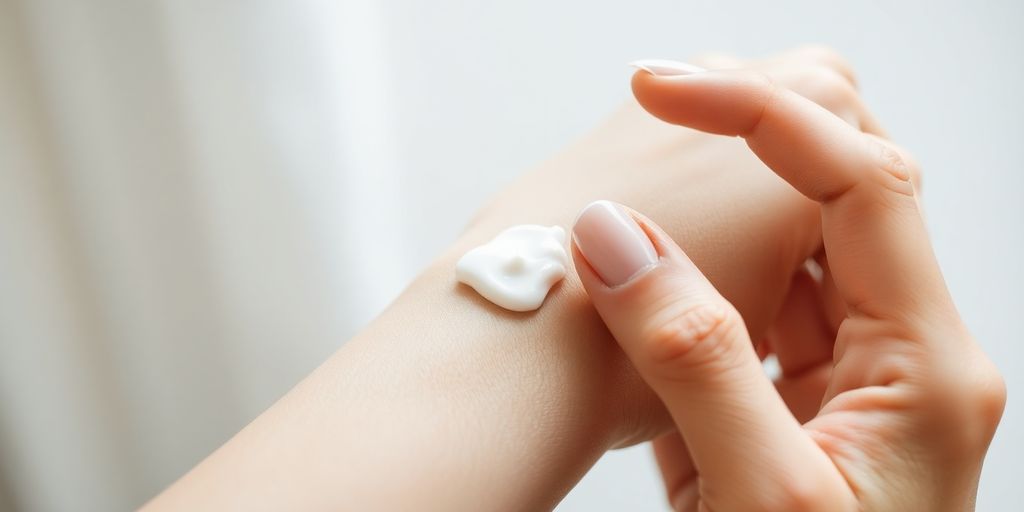
Start by cleaning the chosen area with mild soap and water. This ensures that any reaction is solely due to the product and not some leftover dirt or oil. Dry the area completely before applying a small amount of the product. Cover it with a bandage to prevent it from rubbing off. If the product is something you wash off, like a cleanser, leave it on for the recommended time before rinsing.
Monitoring and Interpreting Results
After applying the product, keep an eye on the area for 24 to 48 hours. You’re looking for signs like redness, itching, or swelling. A little redness might just be from the bandage, but if it doesn’t fade, it could be a mild reaction. If you notice a rash or severe irritation, it’s best to stop using the product immediately. For those with sensitive skin, repeating the test over a few days can help confirm any reactions.
Remember, patch testing isn’t just a one-time thing. It’s a simple step that can save your skin from unwanted reactions, making your skincare routine safer and more effective.
Identifying Products That Require Patch Testing
High-Risk Ingredients to Watch Out For
When it comes to patch testing, not all products are created equal. Some ingredients are notorious for causing skin reactions, and it’s wise to be cautious with them. Active ingredients like exfoliating acids, vitamin C, and retinol are among the most common culprits. These ingredients can be potent and may lead to irritation or even allergic reactions. It’s always a good idea to patch test products containing these ingredients before slathering them all over your face.
Other high-risk ingredients include:
- Fragrances: Often added to enhance the product’s scent, but can be irritating.
- Preservatives: Necessary for product longevity, yet sometimes harsh on the skin.
- Essential oils: Natural, but not always gentle on sensitive skin.
Products That Can Be Safely Skipped
While patch testing is generally recommended for all new products, there are some exceptions. Products like mild moisturizers, especially those free of fragrances and active ingredients, are usually safe to use without a patch test. These formulas are designed to be gentle and are less likely to cause a reaction.
However, always consider your skin’s unique sensitivity. If you have a history of skin reactions, it’s better to err on the side of caution and test everything.
The Impact of Active Ingredients on Skin
Active ingredients are the powerhouse of skincare products, designed to target specific skin issues. While they can be incredibly effective, they can also be irritating if your skin isn’t used to them. Patch testing helps you gauge your skin’s tolerance to these ingredients.
- Exfoliating Acids: These can help with skin texture and tone but may cause peeling or redness initially.
- Retinol: Known for its anti-aging benefits, but can cause dryness and sensitivity.
- Vitamin C: Great for brightening, yet sometimes leads to tingling or redness.
Patch testing is a valuable diagnostic tool for identifying allergic reactions to cosmetics and skincare products. It helps you avoid irritants and manage your skin health effectively.
Testing these products on a small skin area first can prevent unwanted reactions and help you integrate them into your routine safely.
Recognizing and Responding to Patch Test Reactions
Signs of a Mild Reaction
When you’re testing a new skin product, mild reactions are generally the least concerning. You might notice a bit of redness or slight itching where you applied the product. These signs usually mean your skin is adjusting to the new formula. It’s important to monitor these reactions to ensure they don’t escalate. If the redness fades quickly, it might be safe to continue testing the product, perhaps by applying it with a moisturizer to see if that reduces irritation.
When to Seek Professional Advice
If you notice more severe symptoms, like persistent redness, swelling, or a rash, it’s time to consult a dermatologist. These could be signs of allergic contact dermatitis, which involves your immune system reacting to an allergen in the product. A dermatologist can perform more thorough tests to pinpoint the exact cause of your reaction. Don’t hesitate to seek help if you’re unsure about your symptoms or have a history of skin allergies.
Managing Severe Allergic Responses
Severe allergic reactions require immediate attention. Symptoms like intense itching, blistering, or a burning sensation indicate a strong reaction to the product. In such cases, stop using the product right away and wash the area with mild soap and water. Applying a cold compress can help soothe the irritation. If symptoms persist, over-the-counter antihistamines or topical steroids might be necessary, but always consult a healthcare provider before using these treatments.
Patch testing can save your skin from adverse reactions, but knowing when to reach out for professional help is key. Trust your instincts—it’s better to be cautious when it comes to your skin health.
Integrating Patch Testing into Your Skincare Routine
Frequency of Patch Testing for New Products
When it comes to introducing new skincare items, patch testing should be your first step. It’s smart to test every product before it becomes a staple in your routine. For those who love trying out new stuff, this might feel like a chore, but it’s worth it. Ideally, patch test each product before full application, especially those with active ingredients like retinol or acids. If you’re switching up products often, you might find yourself patch testing more frequently.
Balancing Patch Testing with Regular Skincare
Integrating patch testing doesn’t mean you have to disrupt your entire skincare routine. The key is to be consistent and patient. Start by testing one product at a time to accurately identify any reactions. You can continue with your usual products while testing; just make sure the test area remains untouched by other products. If you’re using face oils as part of your routine, patch testing is especially recommended to ensure they suit your skin. They can provide immediate hydration but might not be for everyone.
Tips for Consistent and Effective Testing
To make patch testing a regular part of your routine, consider these tips:
- Set a specific day: Pick a day of the week to test new products, so it becomes a habit.
- Document your results: Keep a journal or notes on your phone about which products you tested and the outcomes.
- Be patient: Some reactions take time to appear, so give it at least 24 hours before making a decision.
Incorporating patch testing into your skincare routine might seem tedious at first, but it can save you from potential skin mishaps. It’s all about being proactive and ensuring that what you put on your skin is truly beneficial.
Professional vs. At-Home Patch Testing

Benefits of Consulting a Dermatologist
When you go to a dermatologist for a patch test, you’re getting the full package. These pros use a bunch of adhesive patches, each with different ingredients that might cause skin issues. This method can pinpoint exactly what you’re allergic to. It’s especially helpful if you’ve got a history of skin problems or suspect a specific allergy. Dermatologists have the know-how to spot even the tiniest signs of a reaction, which can be crucial for managing your skin’s health.
How At-Home Testing Compares
Doing a patch test at home is pretty straightforward. You just dab a small amount of the product on your skin and watch for any reaction. It’s great for figuring out if a new cream or lotion might irritate you. But here’s the catch: while it can show if you’re sensitive to something, it doesn’t always tell you if it’s a full-blown allergy or just a minor irritation. You’re also on your own to guess which ingredient is the troublemaker.
When to Opt for Professional Testing
Sometimes, it’s just better to leave it to the experts. If your skin flares up badly or if you’ve had reactions in the past, seeing a dermatologist is the smart move. They can run tests that are more detailed and accurate than anything you can do at home. Plus, they can offer treatments if you do have an allergic reaction. If you’re ever in doubt, a professional’s advice can be a real lifesaver.
At-home tests are handy for everyday use, but for serious concerns, professional testing is the gold standard. Always prioritize your skin’s health and don’t hesitate to seek expert help when needed.
Wrapping It Up: Why Patch Testing Matters
So, there you have it. Patch testing might seem like a bit of a hassle, but it’s a small step that can save you from a whole lot of skin trouble down the road. By taking the time to test new products on a small area first, you’re giving your skin a chance to tell you if it’s a match or a disaster waiting to happen. Remember, everyone’s skin is different, and what works for one person might not work for another. So, next time you’re excited to try out that new serum or moisturizer, take a moment to patch test. Your skin will thank you for it.

Frequently Asked Questions
What is a patch test?
A patch test is a simple way to check if your skin might react badly to a new product. You put a tiny bit of the product on a small area of your skin and wait to see if anything happens.
Why should I patch test new skin products?
Patch testing helps you find out if a product will make your skin itchy, red, or cause a rash before you use it all over your face or body. This way, you can avoid bad reactions.
How do I do a patch test at home?
First, pick a small spot on your skin, like the inside of your elbow. Clean it, apply a little bit of the product, and cover it with a bandage. Wait 24 hours to check for any reactions.
What should I look for during a patch test?
After 24 hours, check the area for redness, itching, or bumps. If you see any of these signs, you might be allergic to the product.
Can I skip patch testing for some products?
It’s usually safe to skip patch testing for mild moisturizers without perfumes or active ingredients. But it’s best to test products with strong ingredients like acids or retinol.
What if I have a reaction during a patch test?
If your skin gets red or itchy, wash the area with water and stop using the product. If it gets worse, you might want to talk to a doctor.


Can you be more specific about the content of your article? After reading it, I still have some doubts. Hope you can help me. https://www.binance.com/vi/register?ref=WTOZ531Y
Can you be more specific about the content of your article? After reading it, I still have some doubts. Hope you can help me.
Thanks for sharing. I read many of your blog posts, cool, your blog is very good.
I don’t think the title of your article matches the content lol. Just kidding, mainly because I had some doubts after reading the article.
I don’t think the title of your article matches the content lol. Just kidding, mainly because I had some doubts after reading the article.
Your point of view caught my eye and was very interesting. Thanks. I have a question for you.
Thank you for your sharing. I am worried that I lack creative ideas. It is your article that makes me full of hope. Thank you. But, I have a question, can you help me?
Very interesting info!Perfect just what I was looking for!